
The calendar dashboard
The calendar dashboard shows a person’s booked time across weeks, rather than within one week as the week portal does. It is where somebody looks to see what they have recorded, and where they can drag an entry from one day to another.
By the end of this example there is a Time Registration dashboard showing customer time, internal time and weeks, with a workflow behind the weeks.
Before you start
Section titled “Before you start”- CtrlTime set up, with its employee, time and week objects in place.
- Add a calendar to a portal worked through once. The Calendar component is configured the same way here, and that example explains its parts.
-
Create the dashboard.
In the CtrlPortals configuration, expand Dashboards and create one called
Time Registration. Add a segment, and inside it a component with its type set to Calendar.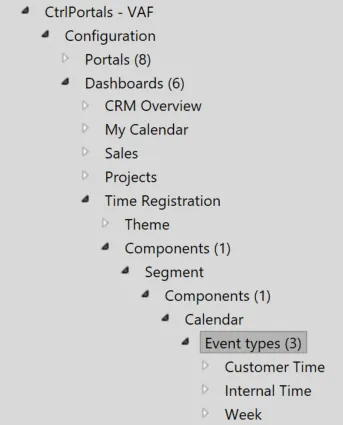
A Time Registration dashboard with one segment holding a calendar. -
Add an event type for customer time.
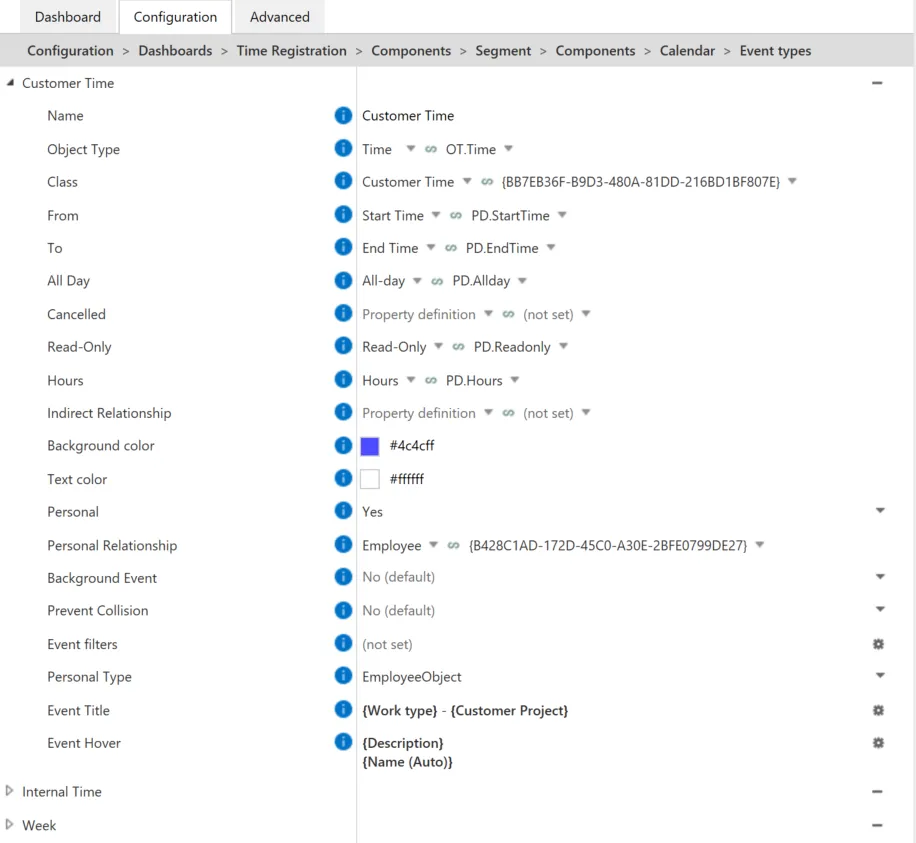
The customer time event type on the calendar dashboard. -
Add an event type for internal time.
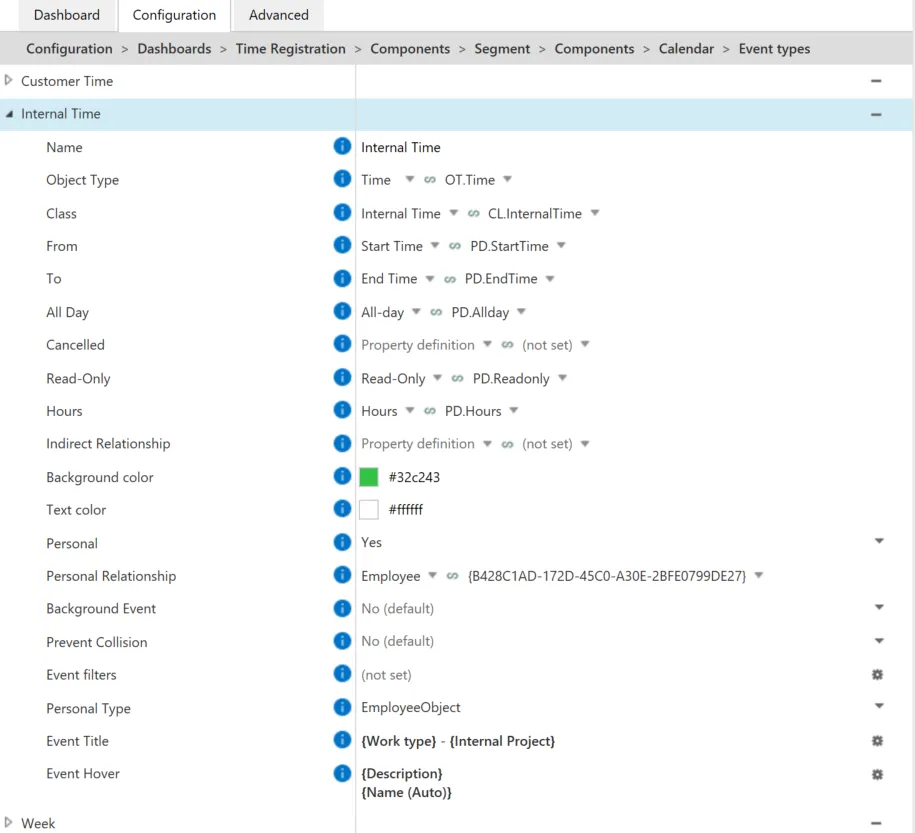
The internal time event type, in a different colour. -
Add an event type for weeks.
Weeks appear on the calendar as all-day events spanning the week, which is what makes the week’s state visible next to the entries in it.
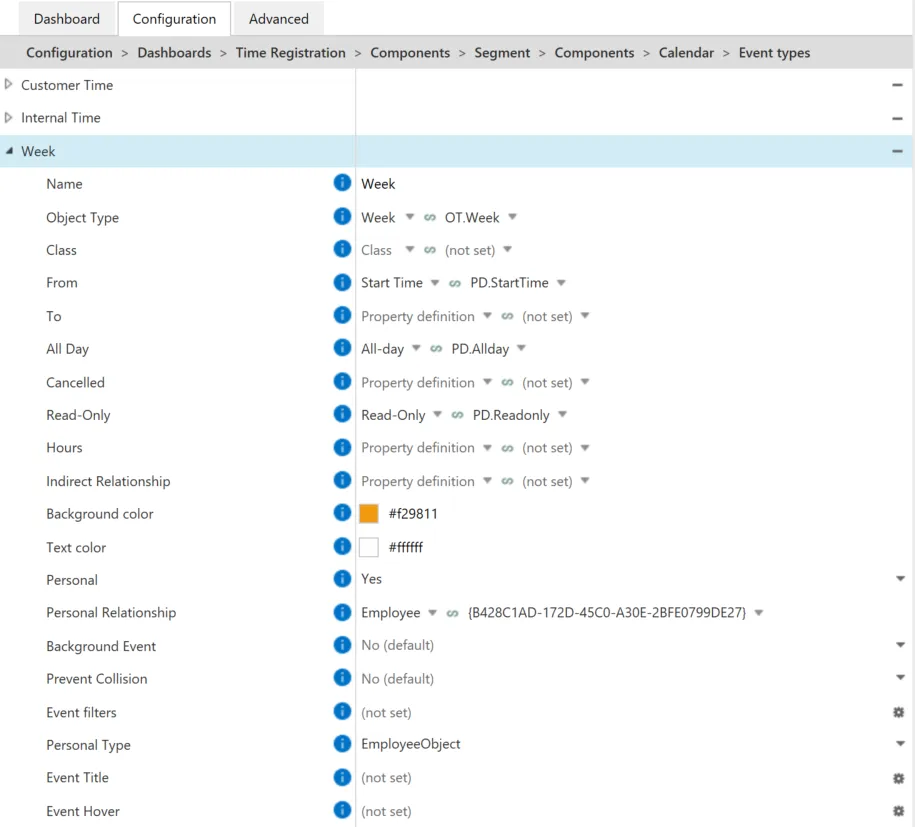
The week event type, shown as an all-day event across the week. -
Choose what each event says.
Event title and Event hover decide what is written on an entry and what appears when somebody points at it. Both take placeholders, added from the settings icon on the right.
A title of the project and an hover of the description is a reasonable start — the title has very little room on a busy week.
-
Build the week workflow.
A minimal one has three states:
- Draft — a state action sets the all-day property to
Yes. Restrict who can edit here if timesheets should not be changed by others. - Sent to admin — a state action assigns the week to the manager or administrator.
- Approved or Rejected — rejected returns the week to Draft.
- Draft — a state action sets the all-day property to
-
Point CtrlTime at the objects.
In the CtrlTime configuration, expand the time object and week object sections and set the properties to the ones created during setup.
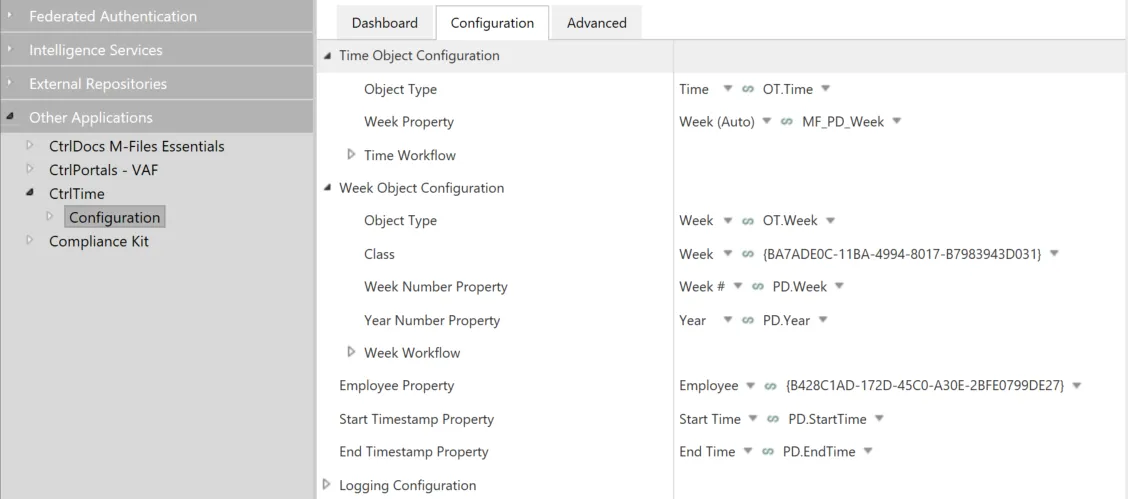
The time and week object configuration in CtrlTime.
What you have now
Section titled “What you have now”A dashboard showing a person’s booked time across weeks, with customer and internal time in different colours and the week itself visible as an all-day band. Entries can be added by dragging, and moving one between weeks re-files it.
The reporting dashboard is the other side of this: totals rather than individual entries.