
Build a portal in the sample vault
This builds a customer portal and an invoicing dashboard in the M-Files sample vault, starting from an empty CtrlPortals configuration. It is the tutorial to work through first: everything else in this section assumes the ideas introduced here.
The sample vault is a small CRM — customers, projects, employees and invoicing — and the work below replaces the metadata card for a customer with something a salesperson would rather look at.
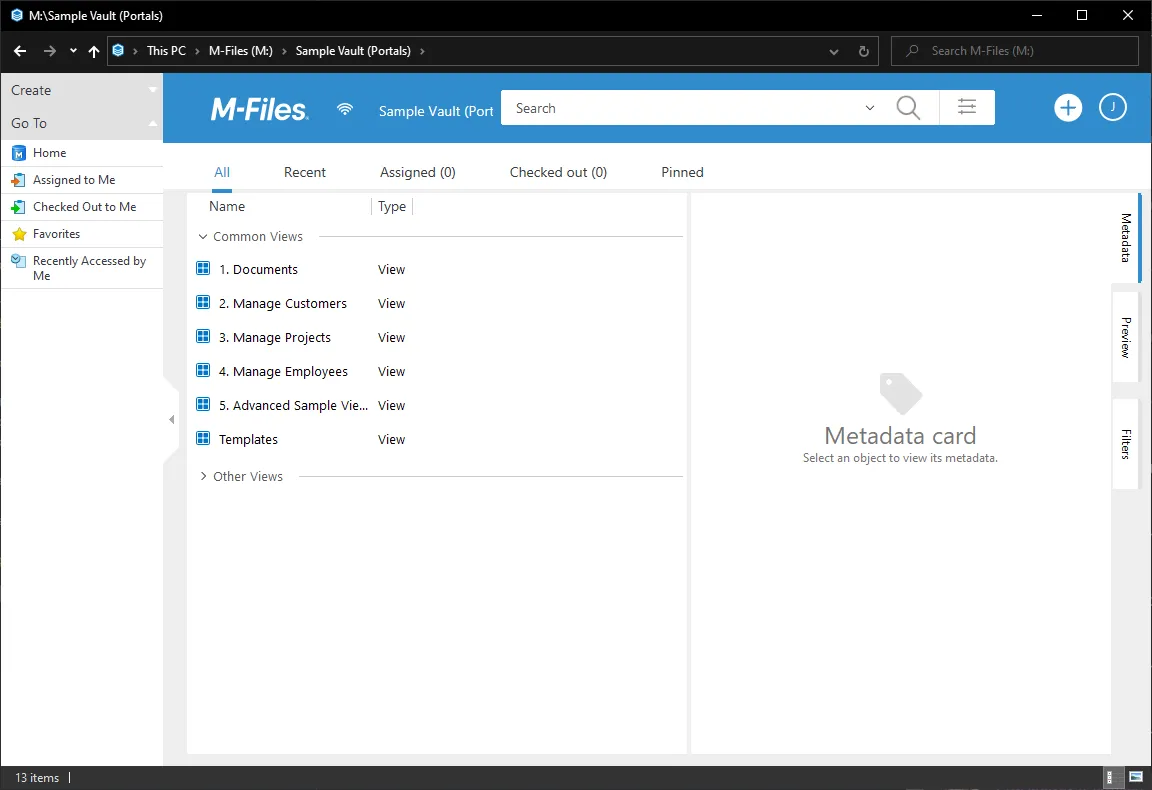
By the end of this example, selecting a customer opens a portal with the customer’s details editable at the top, their projects in one tab and their invoicing as a chart in another — plus a dashboard totalling invoices across all customers.
Before you start
Section titled “Before you start”- The M-Files sample vault, and administrative access to it through M-Files Admin.
- The CtrlPortals
.mfappxfile and its licence file. - Enough familiarity with M-Files Admin to create an object type and a property. M-Files’ own documentation covers that if it is unfamiliar.
-
Install CtrlPortals into the sample vault.
In M-Files Admin, find the sample vault, open its context menu and select Applications.
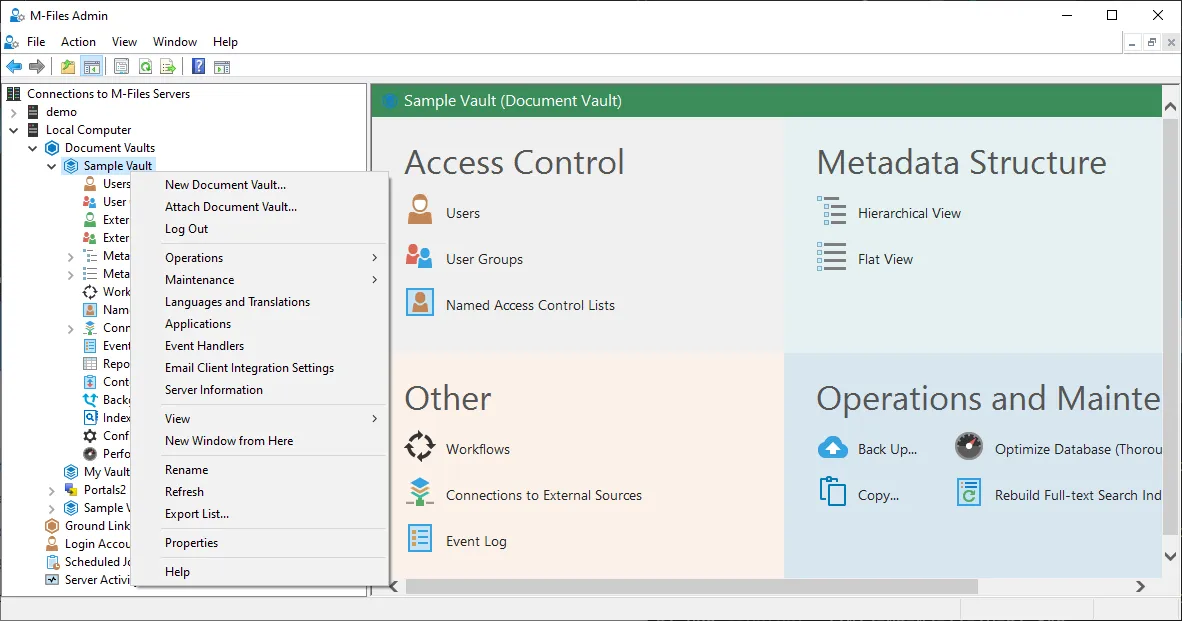
The Applications entry on the sample vault's context menu. Select Install, choose the
.mfappxfile, and add the licence in the same dialog.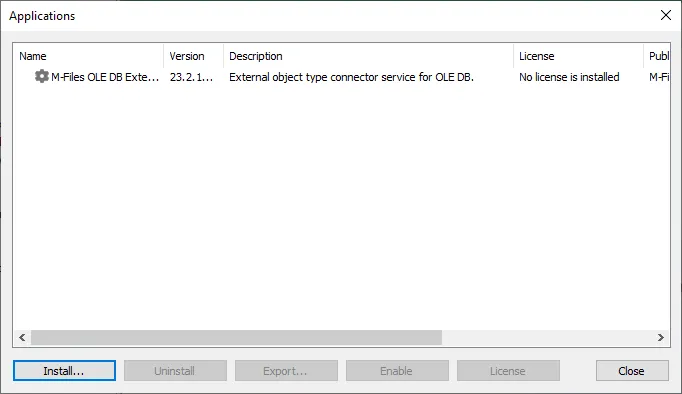
The Applications window, before installing. 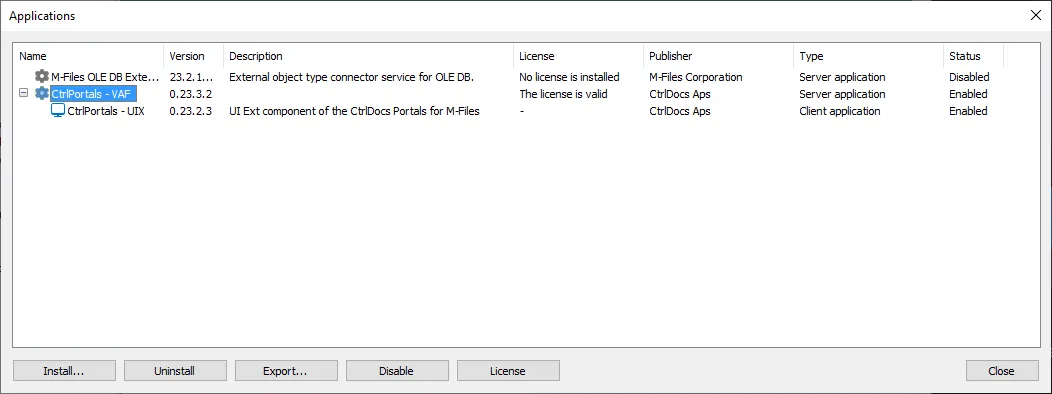
CtrlPortals installed and licensed. Then open Configurations → Other Applications → CtrlPortals - VAF. A small dashboard about the application confirms it is running.
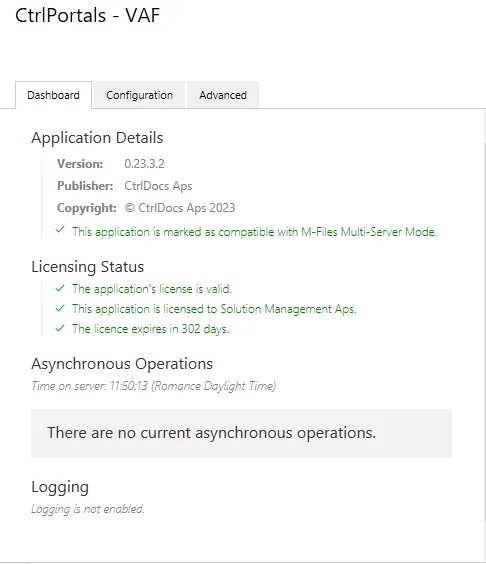
The CtrlPortals dashboard. -
Point CtrlPortals at the Employee object.
Several features need to know which object represents the signed-in user. In the configuration tab, expand Employee configuration and set ObjType to the existing Employee object type.
For UserProperty, the sample vault already has a suitable property called M-Files User.
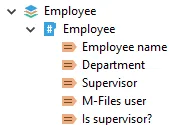
The M-Files User property in the vault's metadata structure. ImageProperty holds a base64-encoded picture of the person. It is not needed here — the editor marks it as required and can be ignored.
-
Set up comments.
Comments are optional, and worth having in a CRM: a comment object type gives replies, mentions and editing rather than plain version comments.
Right-click Metadata Structure (hierarchical view), choose New Object Type, and create one called
Comment/Comments. A speech-bubble icon suits it.Add these properties to the comment class, from its context menu in the hierarchical view:
Property Data type Author Choose from list → Employees Content Multi-line text Guid Text ParentGuid Text ParentObject Choose from list → Comments Mentions Multi-select lookup → Employees Then fill in the comment configuration’s ObjType and CommentClass, and map each property.
Check: the status tabs at the bottom of the configuration are green rather than red before going on.
-
Create the customer portal.
Expand Portals in the configuration and select Add Portal.
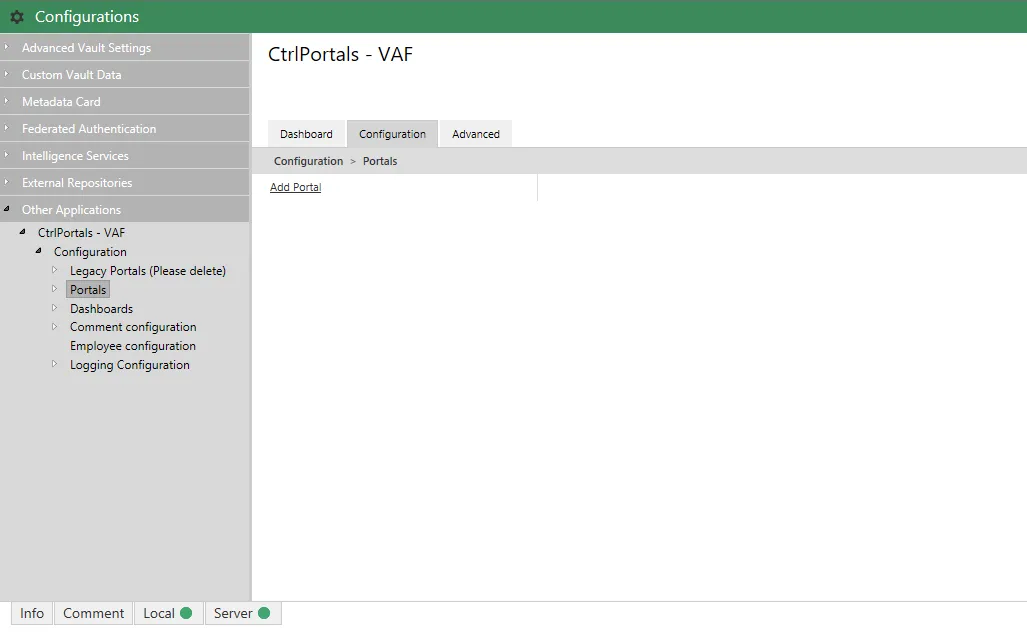
Adding a portal from the configuration menu. Set its Title to
Customer, then open the classes list and add aClassMappingfor the Customer class. The class mapping is what decides when the portal opens: selecting a Customer object shows this instead of the metadata card. -
Add a header.
A portal’s interface is a nested structure of components. Expand the components list and add a
GridComponent— the outermost kind, a grid of rows and up to sixteen columns. A portal can hold several, which is how different parts get different widths.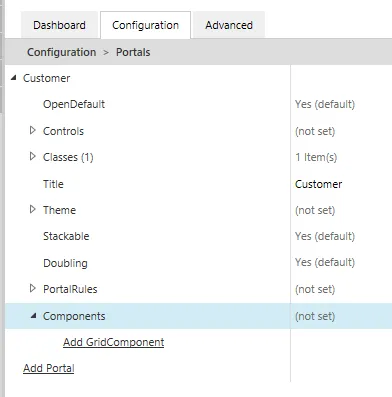
The components list of a new portal. Set this first grid component’s type to HeaderSegment. Set HeaderProperty to
Name or Titleand the subheader to the Class property.The Icon field takes a Fomantic-UI icon class.
bordered inverted purple building outline icongives the purple building M-Files uses for customers.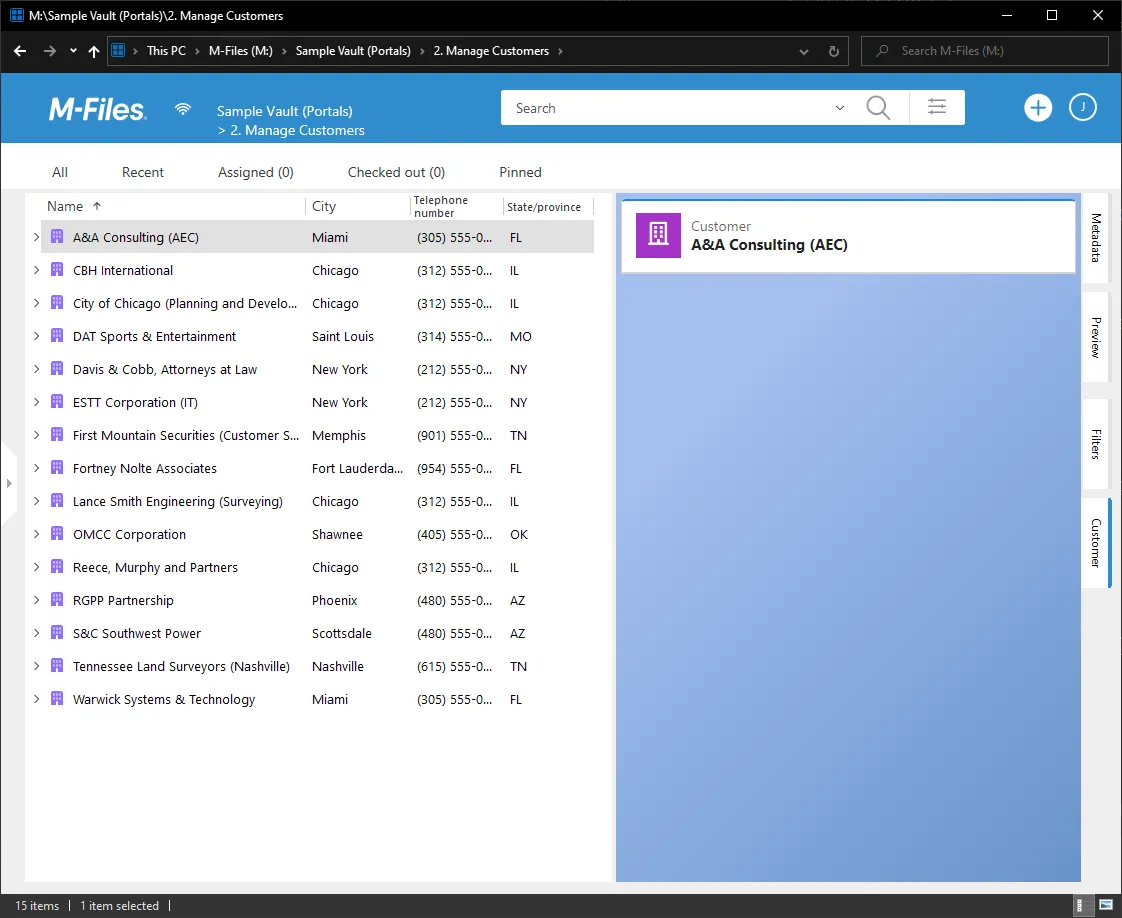
The customer portal with its header. The icon’s colours come from Portal → Theme → Accent. Changing both to violet is a quick way to see how the theme works.
-
Add a list of the customer’s projects.
A list view shows an M-Files view, so the view has to exist first. Create one showing all projects, grouped by customer.
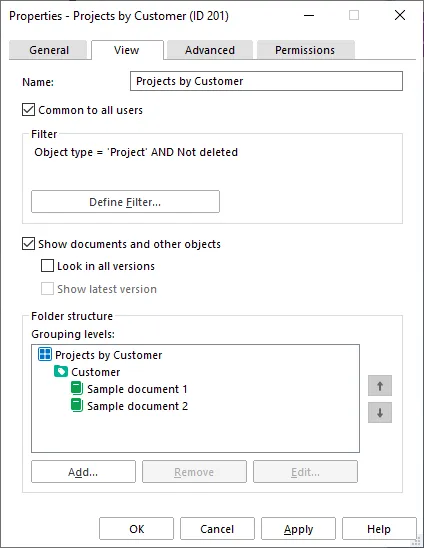
A new view of all projects, grouped by customer. Its ID is shown in the title bar. Add a second
GridComponent, this time of type Segment, and put a List View component inside it pointing at the new view.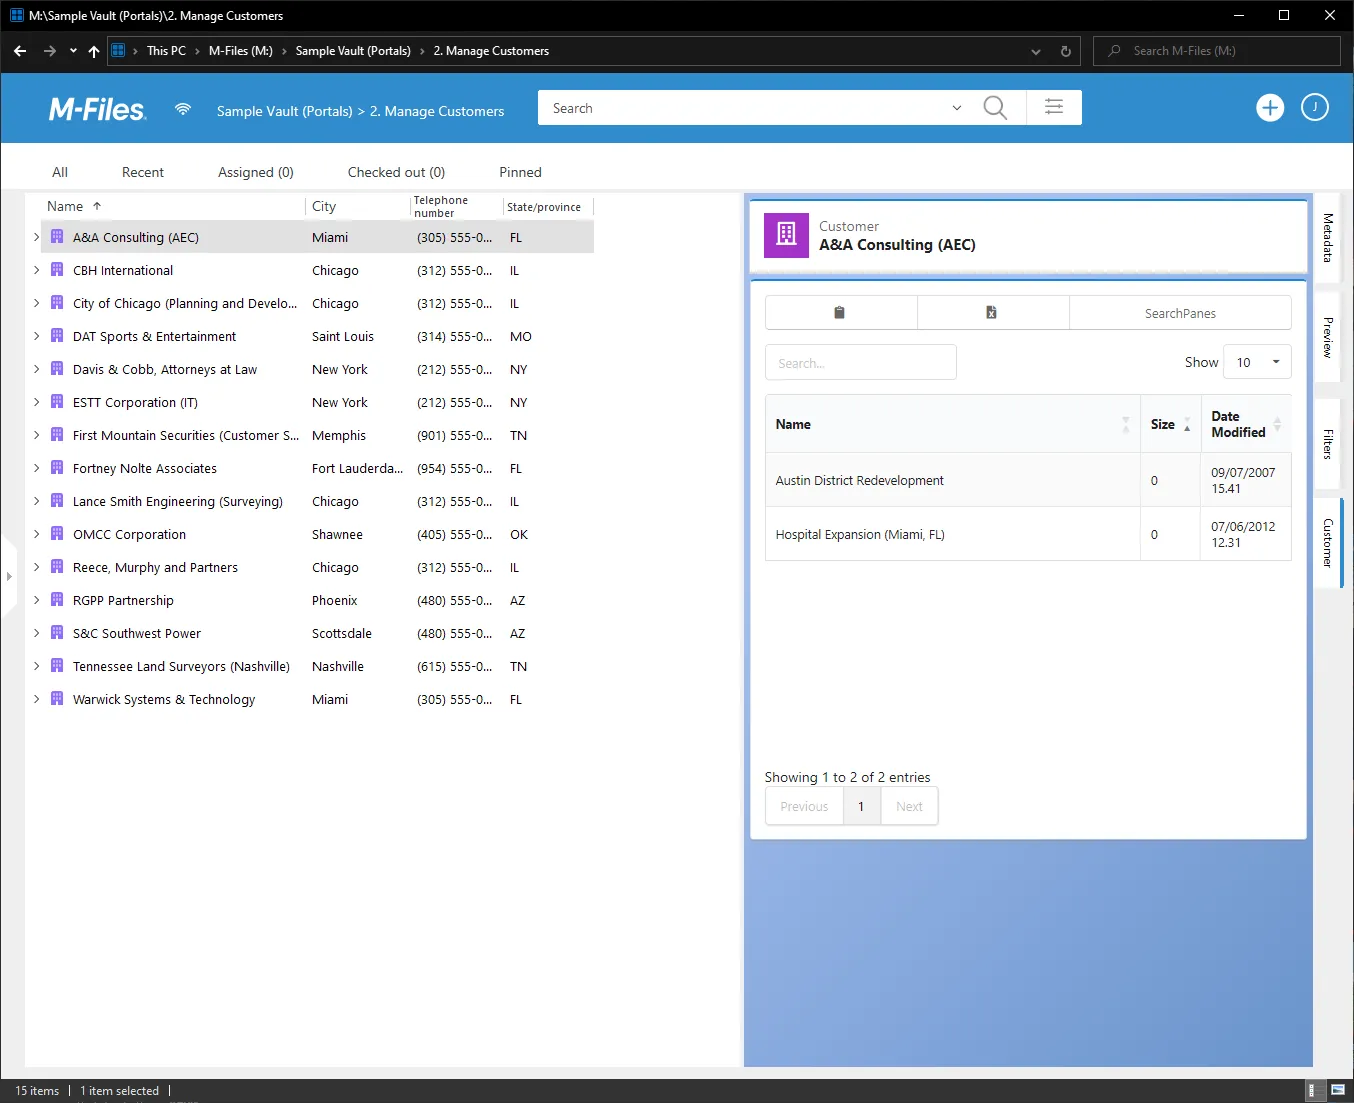
The list view added to the portal. The table arrives with only the default Name, Size and Date modified columns, because the view has no columns chosen. Open the view in the client, select a customer, right-click the header and choose the columns worth seeing — the contact person, the project manager, whether the project is in progress. Then right-click and choose Save as common display settings.
That option needs the manage common views right, or full control of the vault.
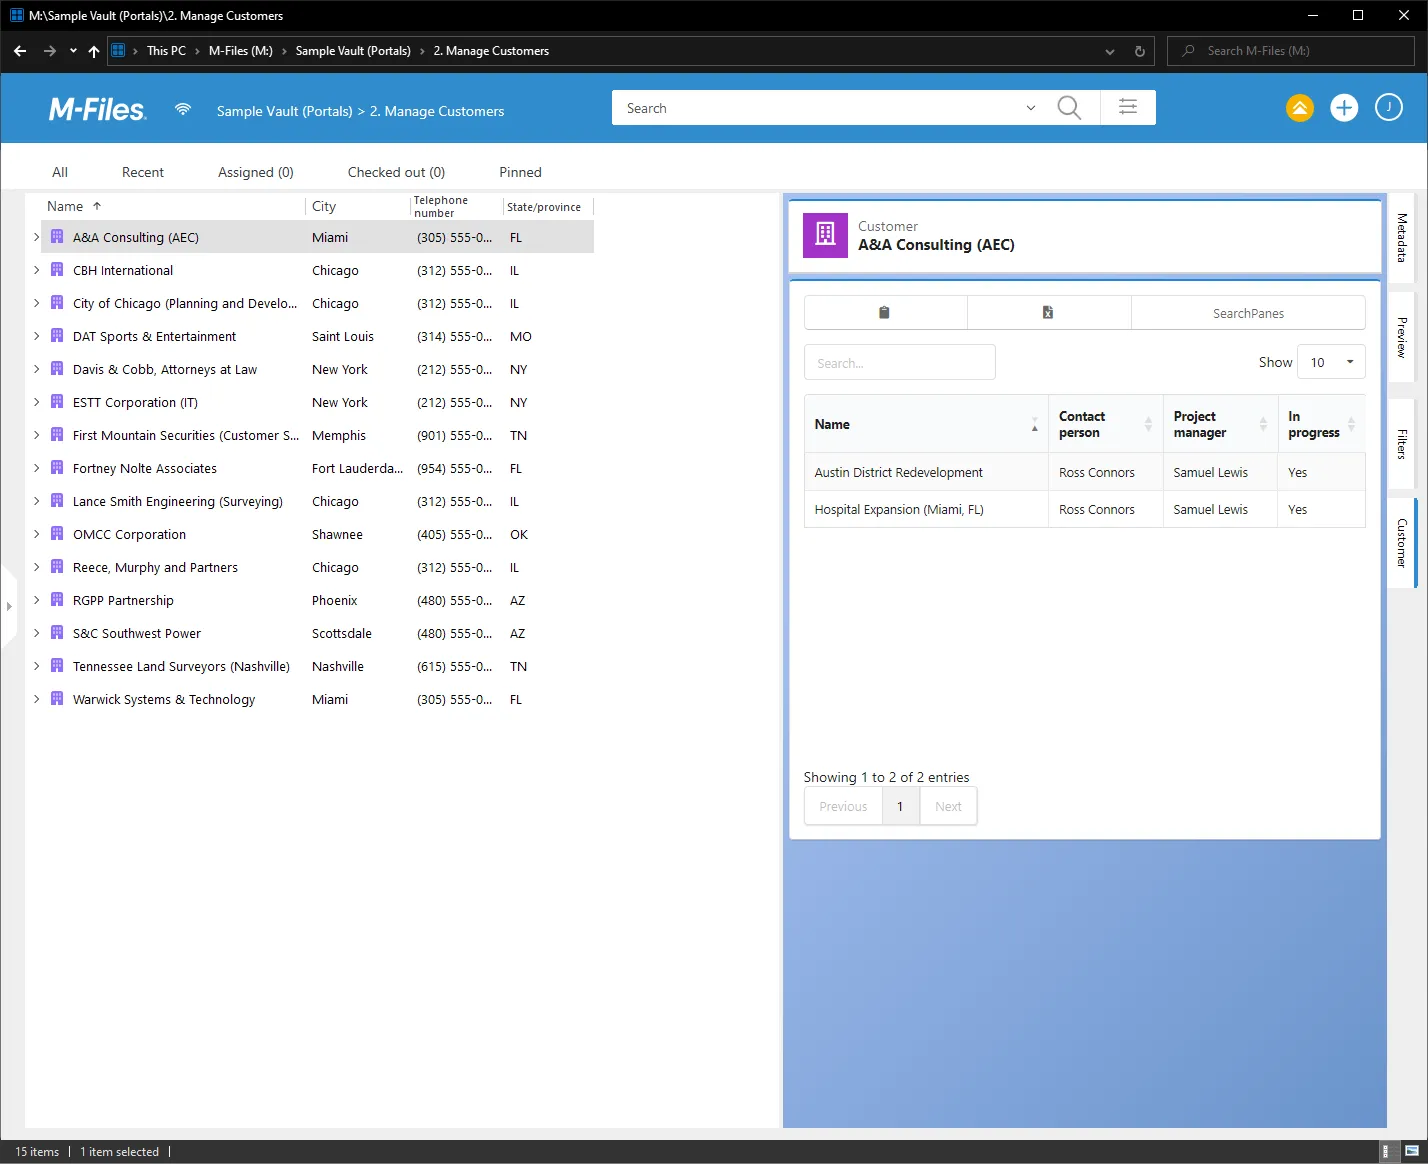
The list view with its columns chosen. -
Make the customer editable.
A form component edits an object’s properties in place, which is what stops people opening the metadata card.
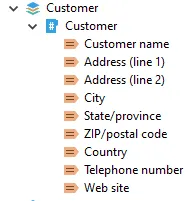
The properties of the Customer object. Add a third
GridComponentbetween the two existing ones, of type Segment, and put a Form component in it. Add a field for each property worth editing.Fields can be arranged in accordions, columns and rows, so several sit side by side or fold away.
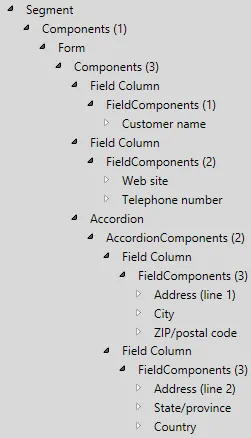
The structure of the customer portal's form. 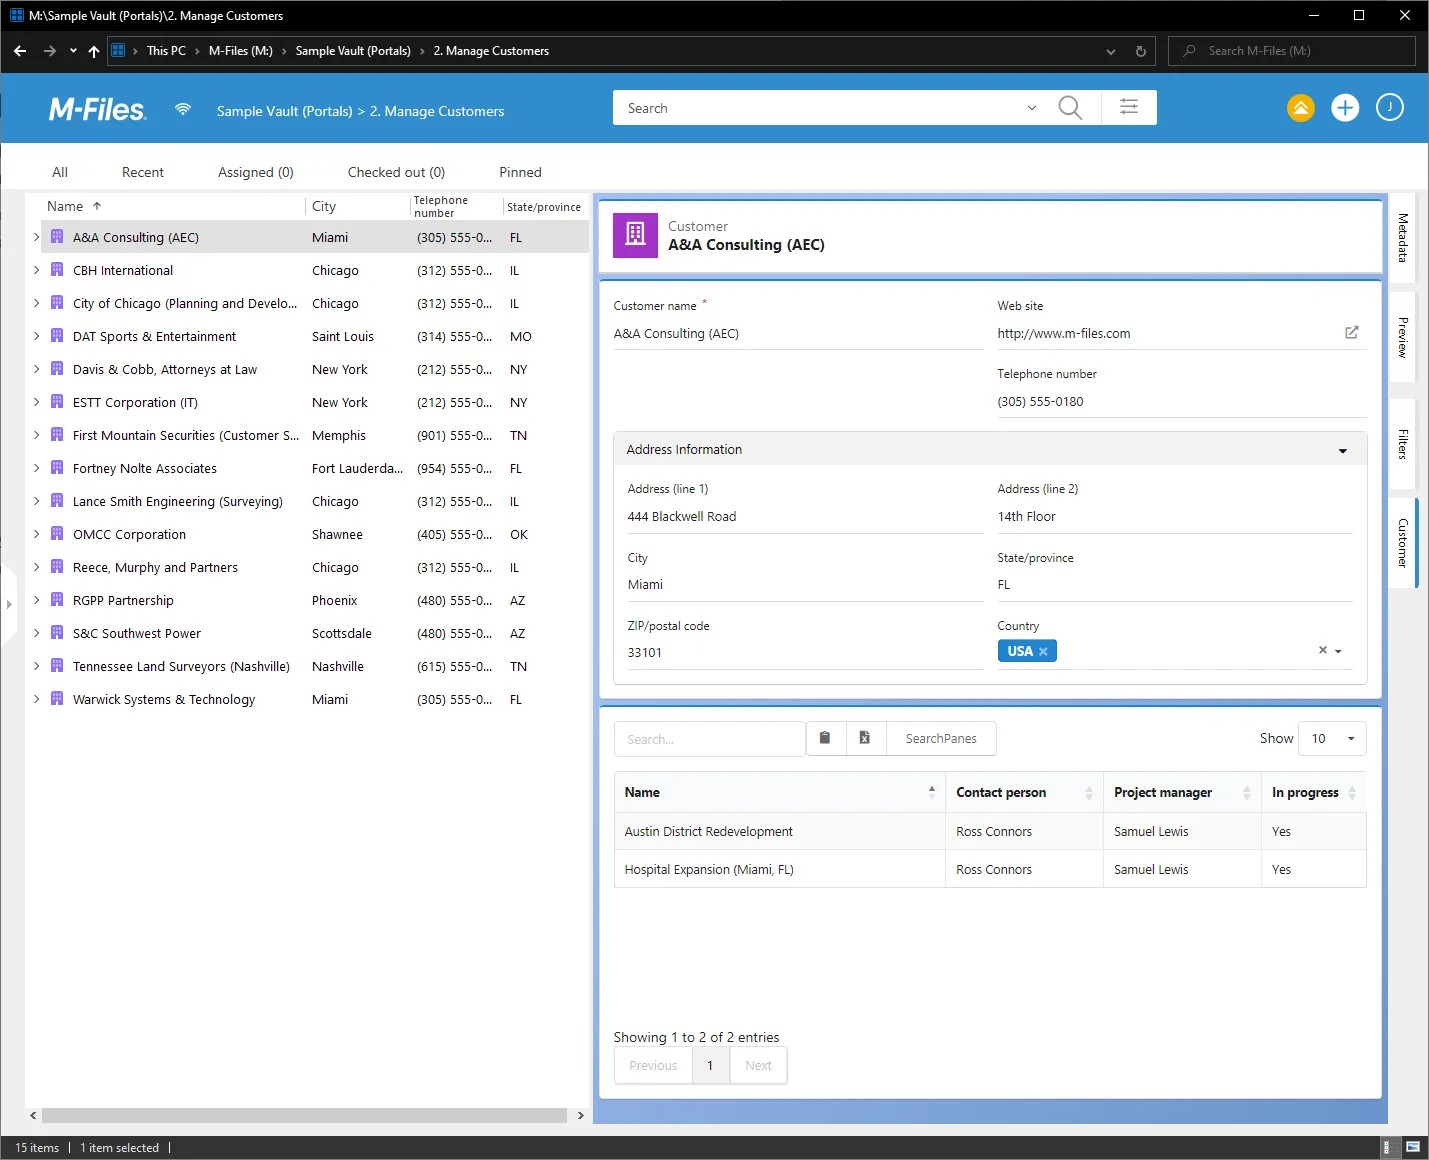
The resulting portal. Then enable Controls at the root of the portal. That adds the workflow controls and an Edit button, so editing follows M-Files’ own check-out and check-in.
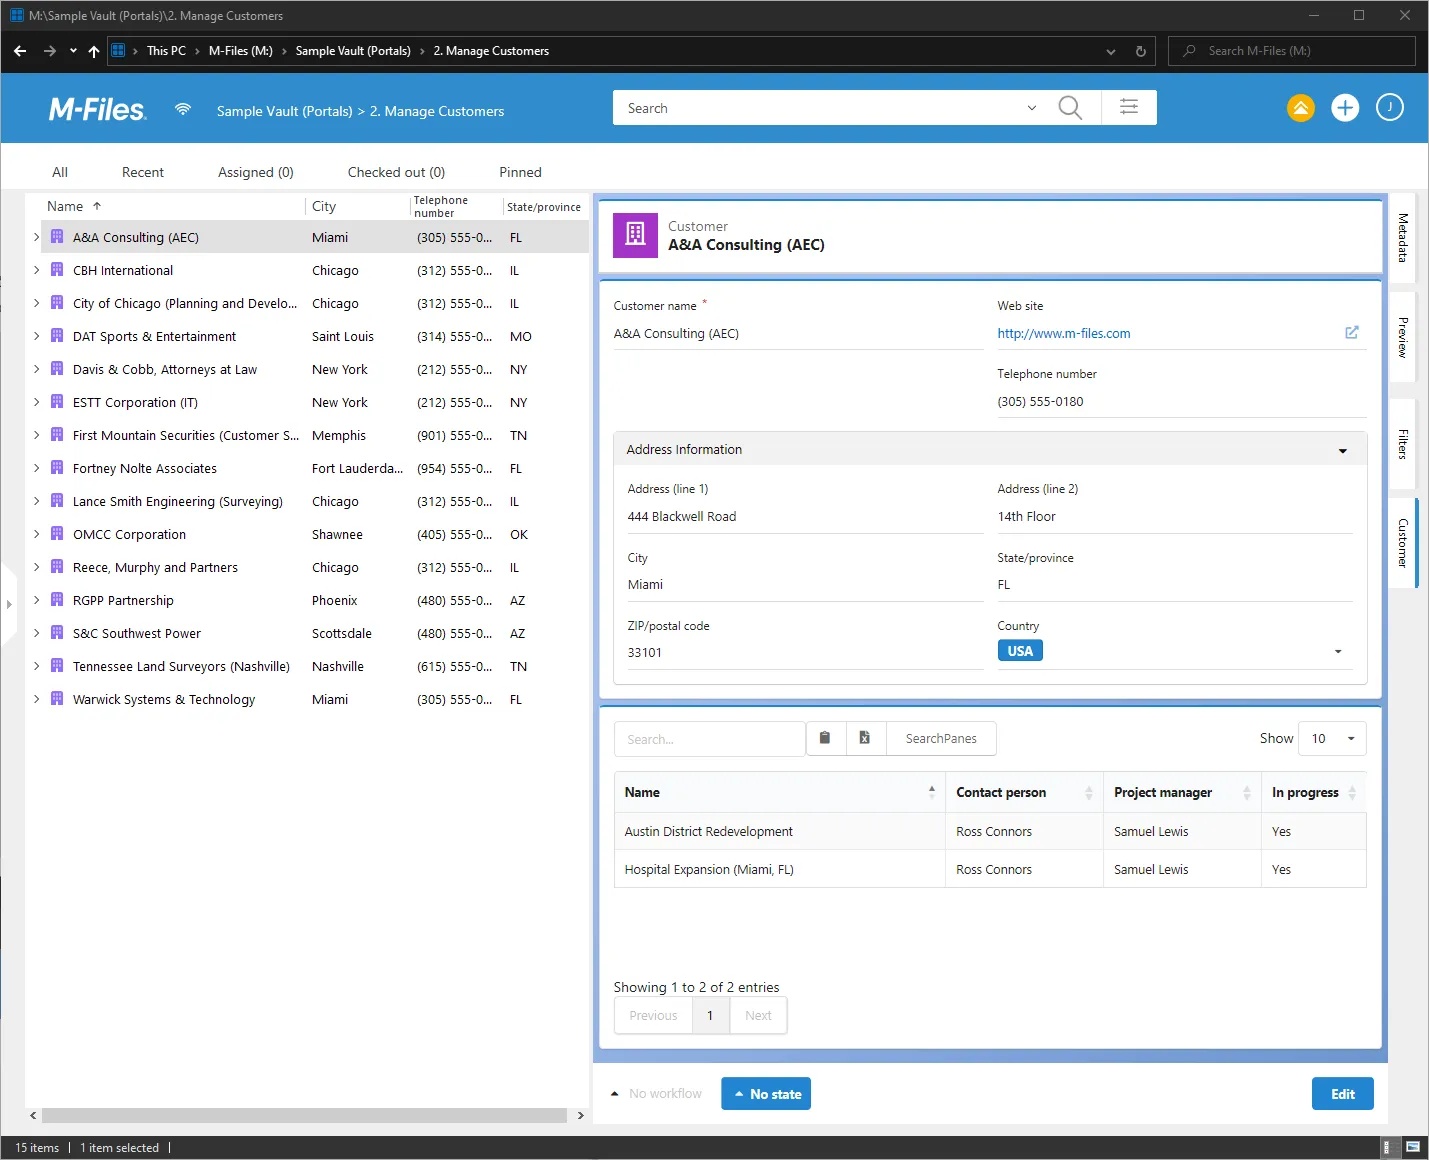
The portal with Controls enabled, showing the Edit button and workflow state. -
Move the list into a menu, and add an invoicing tab.
Projects and invoicing both belong on this portal, and neither is worth half a screen. A Menu component turns them into tabs.
Add a Menu component to the segment holding the list view, add a
MenuTabcalledProjects, and move the list view inside it.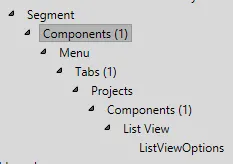
The list view moved inside a menu tab. Add a second
MenuTabcalledInvoicing. -
Add a plot of the customer’s invoices.
Inside the Invoicing tab, add a component and set its Type to Plot View. In its Plot view section, set Title to
Invoicesand Height to 300 pixels.Expand Query Configuration. A query is a set of series — the same idea as series in a spreadsheet. Add one:
- Name it
Invoices, with object type Document and classSales Invoice. - Set the indirect relation to
Customer. Direct means a property on the customer points at the invoices; indirect means a property on the invoices points at the customer, which is how the sample vault is built. - In SelectedPropertyValues, add the invoice’s document date with the column name
date. - Add
Name or Titleas a second column namedcount— this is the column being counted. - Set the aggregation to Count, and put
datein GroupColumns. Aggregations only work over a grouped column. - Set RoundDateTimeColumns to
dateand RoundDateTimeUnit toDay, so invoices dated the same day are counted together.MonthorYeargroups them more coarsely.
It helps to picture the table being built:
date count 2006-01-23 2 2006-01-30 1 2006-02-06 3 2006-02-13 1 Set LabelColumn to
date— the horizontal axis — and ValueColumn tocount.Finally add a where-condition excluding deleted objects, so the chart matches what a user would see.
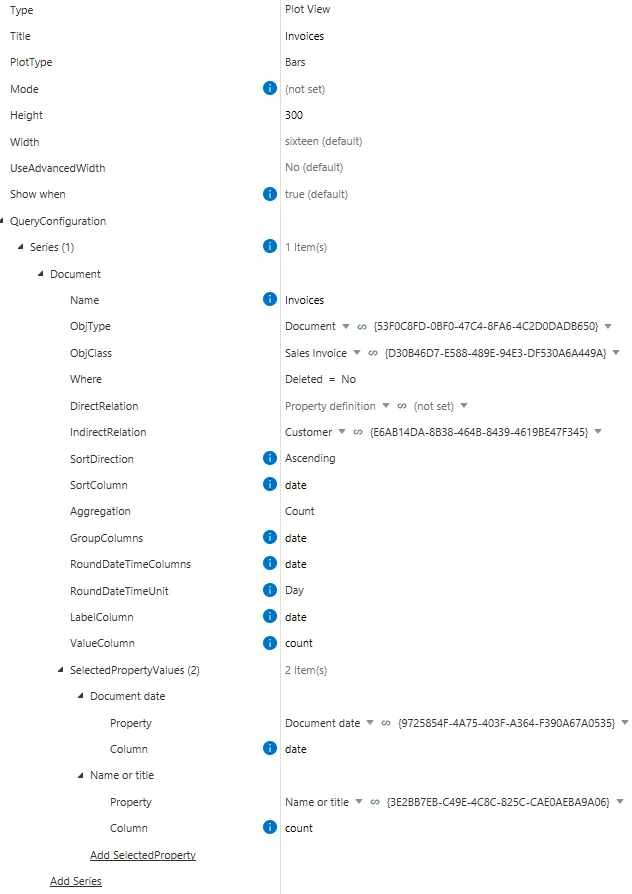
The completed plot configuration. 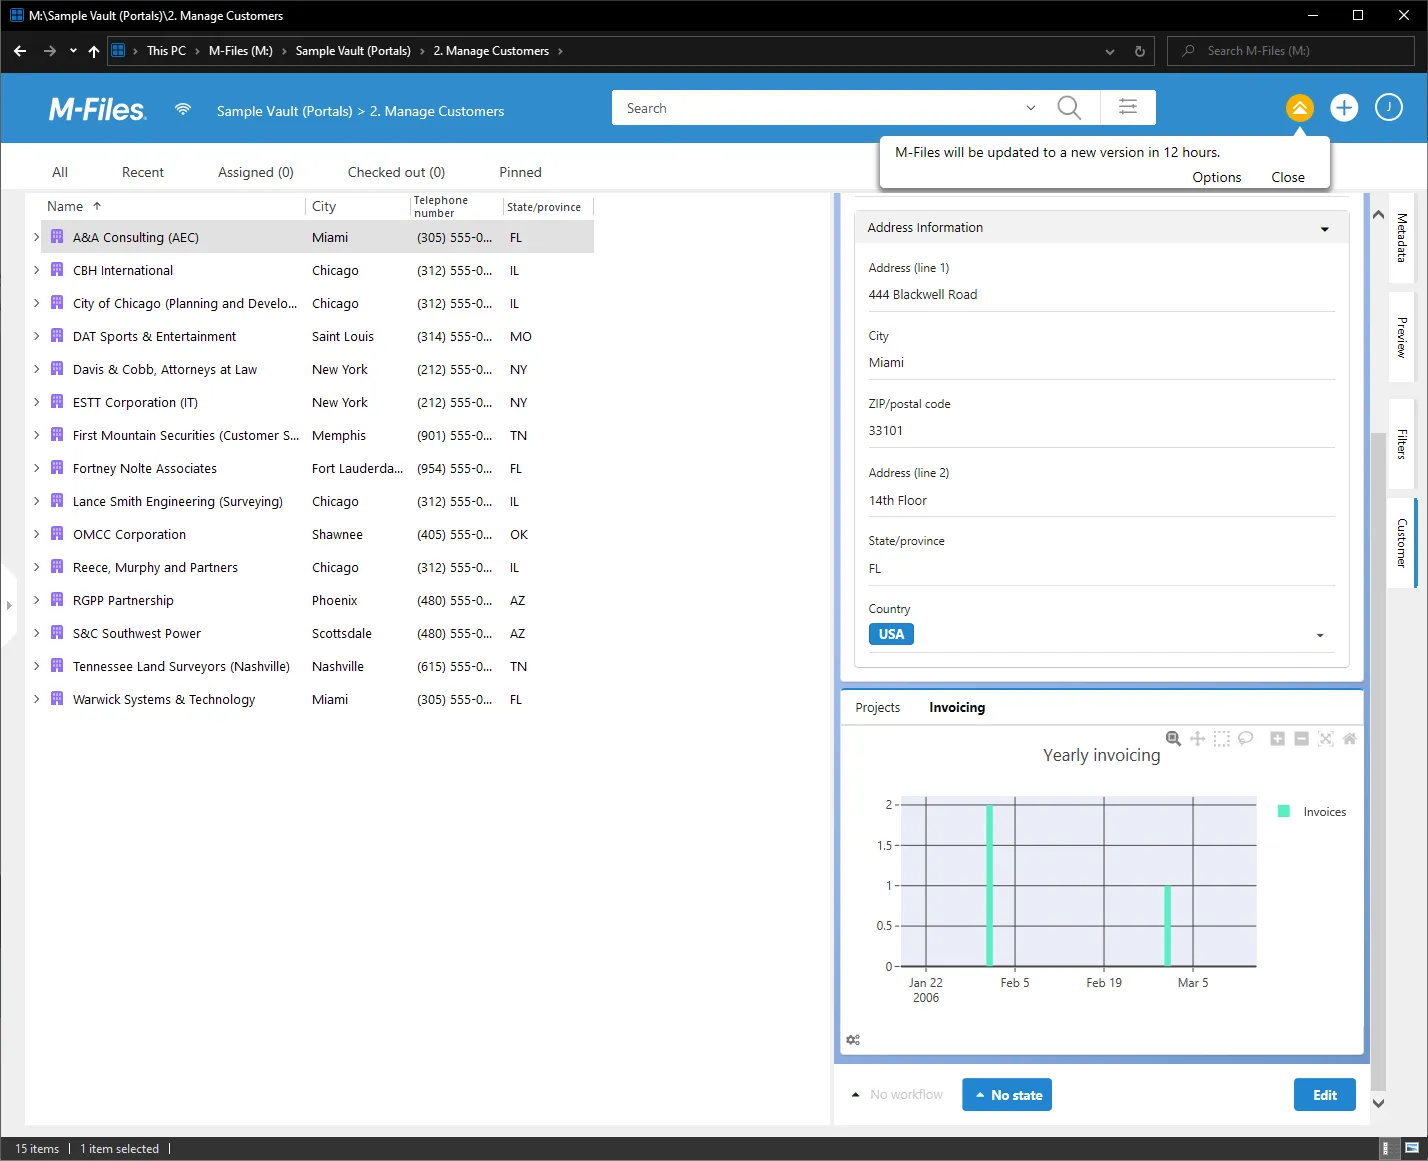
The invoicing plot on the customer portal, one bar per day. It was captured under an earlier title, Yearly invoicing. The sample vault holds very few sales invoices, all dated 2006 and 2007, so the chart is sparse. That is the data, not the configuration.
- Name it
-
Add a dashboard.
A dashboard is a portal not attached to any object. It opens from the CtrlPortals menu in the left pane, which makes it the place for anything about the vault as a whole.
At the top of the configuration select Dashboards, add one, and title it
Invoicing. Add aGridComponent, a Segment inside it, and a single plot view.Configure a Pie chart called
Invoices by Customer: one series over documents of classSales Invoice, aggregating by Count, grouped by the customer property that every sales invoice carries. Two columns again — the customer, and the title being counted.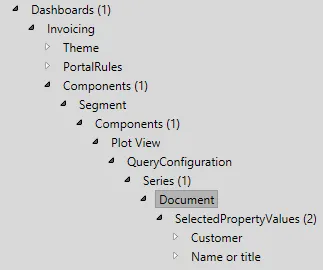
The dashboard's configuration. 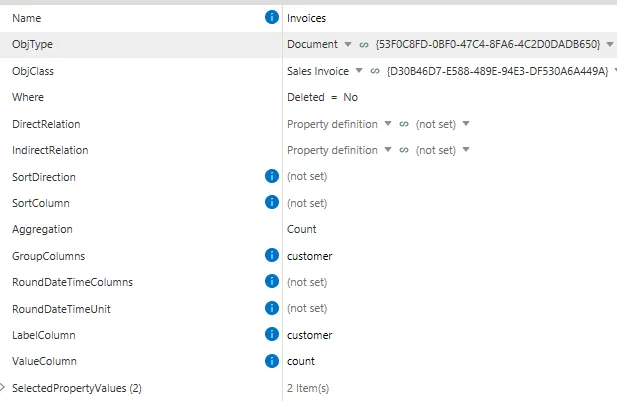
The dashboard's plot configuration. 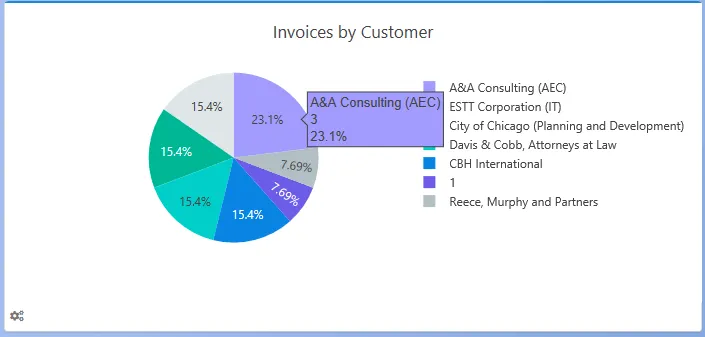
The finished invoicing dashboard.
What you have now
Section titled “What you have now”A customer portal that opens instead of the metadata card: the customer’s details editable at the top, their projects in one tab, their invoicing charted in another. Plus a dashboard totalling invoices across every customer.
More usefully, the shape of every portal: grid components containing segments, segments containing components, and a query configuration behind anything that shows data.
Next, add a calendar to this portal, or look up any of the components used here in the configuration reference.
The configuration this built
Section titled “The configuration this built”The complete configuration is available as raw JSON: open the configuration menu, select the
top level of the hierarchy (CtrlPortals - VAF) and choose the Advanced tab. Yours should
be equivalent to the following.
{ "Employee": { "ObjType": "{39E23C57-2252-410D-BC06-4F8F65AD90B2}", "UserProperty": "{4FBF4FCB-5290-413D-8030-8F1DD50F13D2}" }, "Comment": { "ObjType": "OT.Comment", "CommentClass": "{E9AA963E-9783-45F8-9A45-4183EECCC84D}", "AuthorProperty": "PD.Author", "ContentProperty": "PD.Content", "GuidProperty": "PD.Guid", "ParentGuidProperty": "PD.Parentguid", "MentionsProperty": "PD.Mentions", "ParentObjectProperty": "PD.Parentobject" }, "ObjectPortals": [ { "Title": "Customer", "Classes": [ { "Class": "{5141D850-22EE-4A3D-B3DA-42D6C5AD61A3}" } ], "Components": [ { "Type": "Header Segment", "HeaderProperty": "{3E2BB7EB-C49E-4C8C-825C-CAE0AEBA9A06}", "SubHeaderProperty": "{CEBF9AC9-C60C-4240-9F50-723DBF3A5CA7}", "Icon": "bordered inverted purple building outline icon" }, { "Type": "Segment", "Components": [ { "Type": "Form", "Components": [ { "Type": "Field Column", "FieldComponents": [ { "Property": "{41E35AF4-BD8B-4081-AE84-AE80DA747561}" } ], "Width": "eight" }, { "Type": "Field Column", "FieldComponents": [ { "Property": "{26A75524-CEF7-4BE6-80E3-1A997214EE9C}" }, { "Property": "{0AA8A9A5-B142-419B-8BF3-298DCF663EBB}" } ], "Width": "eight" }, { "Type": "Accordion", "AccordionComponents": [ { "Type": "Field Column", "FieldComponents": [ { "Property": "{C93A5B5D-252C-46D6-923C-04B7B9BFEB81}" }, { "Property": "{36257773-024E-46E6-A996-E28AD49CF98F}" }, { "Property": "{9A9B2824-8C44-4E40-8E58-C31487840550}" } ], "Width": "eight" }, { "Type": "Field Column", "Width": "eight", "FieldComponents": [ { "Property": "{13EC8CE6-92BD-478E-8511-FB73EDF9586B}" }, { "Property": "{77A8D87B-9AEA-49DF-AC62-ABA86FF1E5D1}" }, { "Property": "{82490C2F-8FB2-423B-85B5-F4ADB214C0FD}" } ] } ], "Title": "Address Information" } ] } ] }, { "Type": "Segment", "Components": [ { "Type": "Menu", "Tabs": [ { "Components": [ { "Type": "List View", "ViewID": 201, "ListViewOptions": { "ScrollY": "150" } } ], "Name": "Projects" }, { "Name": "Invoicing", "Components": [ { "Type": "Plot View", "Title": "Invoices", "PlotType": "Bars", "Height": 300, "QueryConfiguration": { "Series": [ { "Name": "Invoices", "ObjType": "{53F0C8FD-0BF0-47C4-8FA6-4C2D0DADB650}", "ObjClass": "{D30B46D7-E588-489E-94E3-DF530A6A449A}", "IndirectRelation": "{E6AB14DA-8B38-464B-8439-4619BE47F345}", "Aggregation": "Count", "SelectedPropertyValues": [ { "Column": "date", "Property": "{9725854F-4A75-403F-A364-F390A67A0535}" }, { "Property": "{3E2BB7EB-C49E-4C8C-825C-CAE0AEBA9A06}", "Column": "count" } ], "GroupColumns": "date", "RoundDateTimeUnit": "Day", "RoundDateTimeColumns": "date", "Where": [ { "conditionType": "equal", "expression": { "type": "statusValue", "statusType": "deleted", "indirectionLevels": [] }, "typedValue": { "dataType": "boolean", "value": { "boolean": false } } } ], "LabelColumn": "date", "ValueColumn": "count", "SortDirection": "Ascending", "SortColumn": "date" } ] } } ] } ] } ] } ], "Controls": { "Enabled": true } } ], "DashboardPortals": [ { "Title": "Invoicing", "Components": [ { "Type": "Segment", "Components": [ { "Type": "Plot View", "PlotType": "Pie", "Title": "Invoices by Customer", "Height": 300, "QueryConfiguration": { "Series": [ { "Name": "Invoices", "ObjType": "{53F0C8FD-0BF0-47C4-8FA6-4C2D0DADB650}", "ObjClass": "{D30B46D7-E588-489E-94E3-DF530A6A449A}", "Where": [ { "conditionType": "equal", "expression": { "type": "statusValue", "statusType": "deleted", "indirectionLevels": [] }, "typedValue": { "dataType": "boolean", "value": { "boolean": false } } } ], "Aggregation": "Count", "SelectedPropertyValues": [ { "Property": "{E6AB14DA-8B38-464B-8439-4619BE47F345}", "Column": "customer" }, { "Property": "{3E2BB7EB-C49E-4C8C-825C-CAE0AEBA9A06}", "Column": "count" } ], "LabelColumn": "customer", "ValueColumn": "count", "GroupColumns": "customer" } ] } } ] } ] } ]}You can copy this JSON and replace your local version if there is a problem with your configuration or if you just don’t want to walk through all the steps for configuring the portal, but you need to verify that the Comment object’s GUID matches the comment object that you’ve created (if you don’t have a Comment object, you need to create one following the steps of this guide).