
Connect the sample vault to Teams
This connects the M-Files sample vault to a Microsoft Teams channel and gets documents flowing between them. It is the fastest way to see what CtrlSync does before deciding how to fit it to a real vault.
The sample vault is a small CRM: customers, projects, employees and invoicing. Its structure is barely changed here — the point is that documents shared in Teams end up preserved in M-Files, not that the vault is rebuilt.
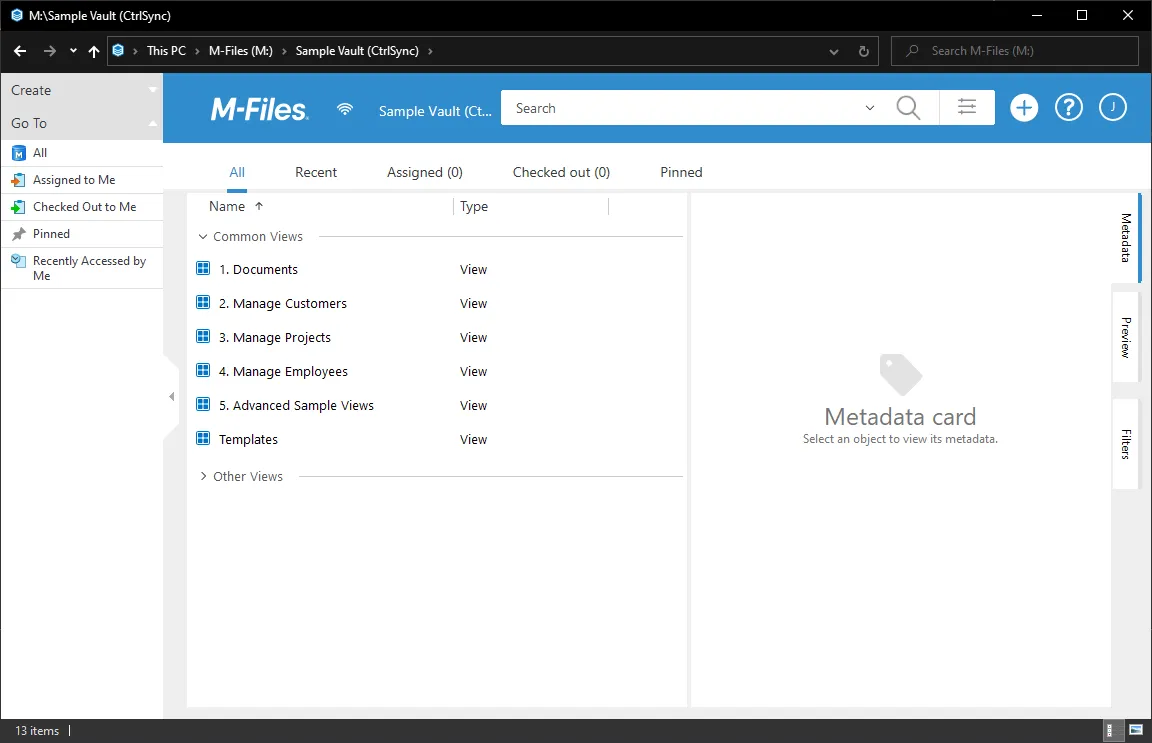
By the end of this example a file uploaded to a Teams channel appears in the sample vault as a document, with its class read from the folder it was filed in.
Before you start
Section titled “Before you start”- The M-Files sample vault, and administrative access to it.
- The CtrlSync
.mfappxfile and its licence file. - Access to your organisation’s Microsoft 365 tenant, including someone who can register an application in Microsoft Entra ID and grant admin consent. CtrlSync cannot reach Teams without it.
- Familiarity with M-Files vault administration.
-
Install CtrlSync into the sample vault.
In M-Files Admin, right-click the sample vault, select Applications, then Install, and choose the
.mfappxfile. Add the licence in the same dialog.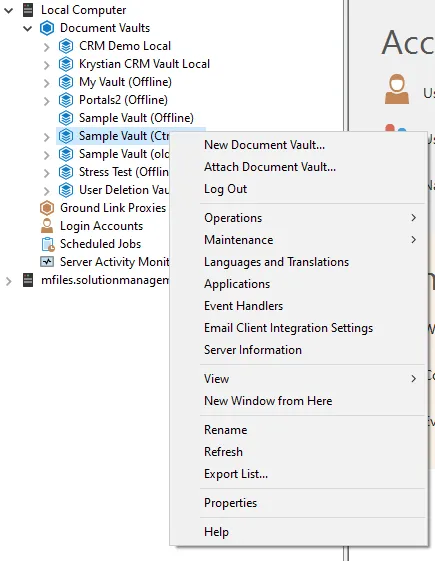
The Applications entry on the sample vault's context menu. Close the dialog and agree to restart the vault. The restart does not start until the dialog is closed.
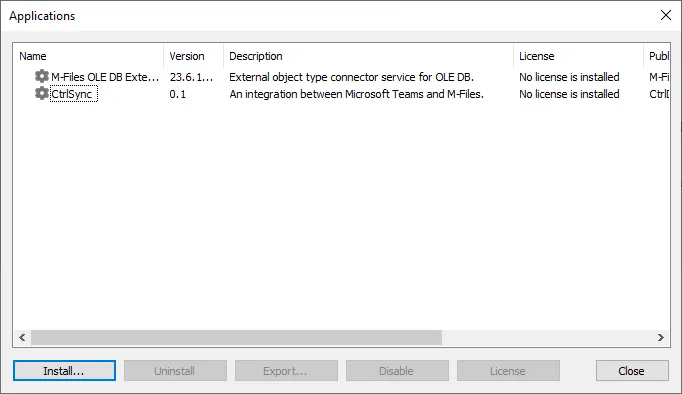
The Applications dialog after CtrlSync has been installed. Confirm it worked: Configurations → Other Applications → CtrlSync should show the application dashboard.
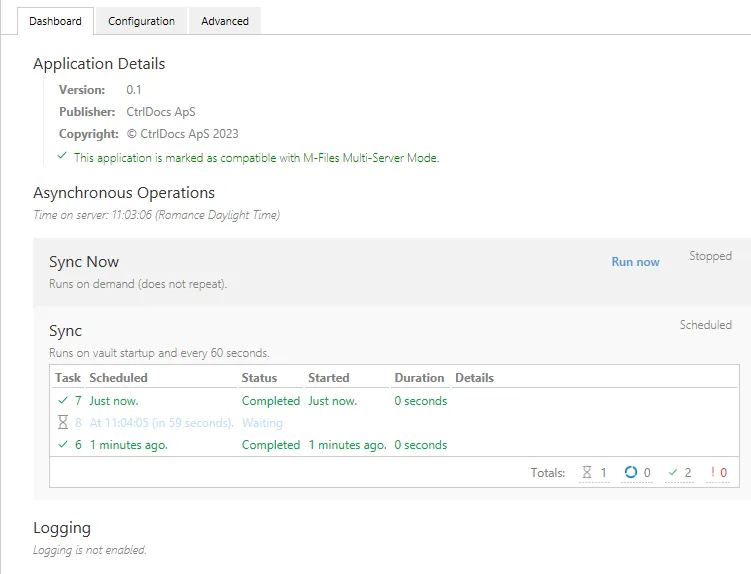
The CtrlSync dashboard, shown once the application is installed and running. -
Register an application in Microsoft Entra ID.
In the Azure portal, open Microsoft Entra ID → App registrations → New registration. Name it
CtrlSync, set the supported account types to single-tenant, and leave the redirect URI blank — CtrlSync signs in as itself, not as a person.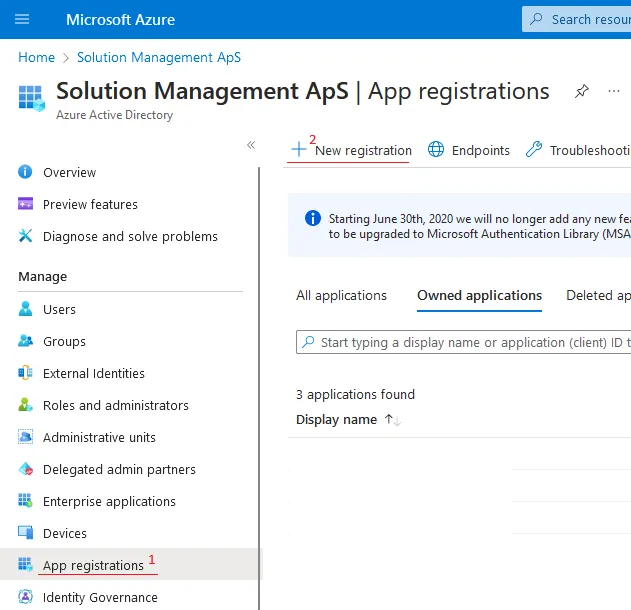
Creating the app registration. The Overview page that follows shows the Application (client) ID and the Directory (tenant) ID.
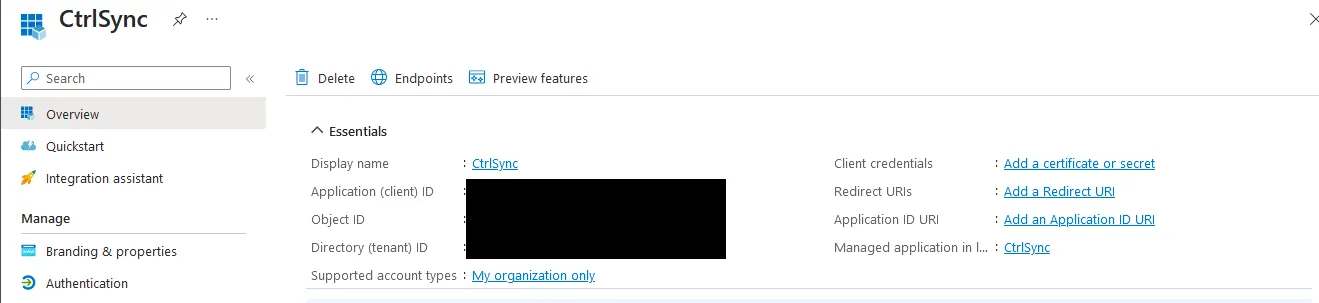
The client and tenant identifiers on the registration's Overview page. -
Create a client secret.
Under Certificates & secrets, select New client secret, give it a description and an expiry, and add it.
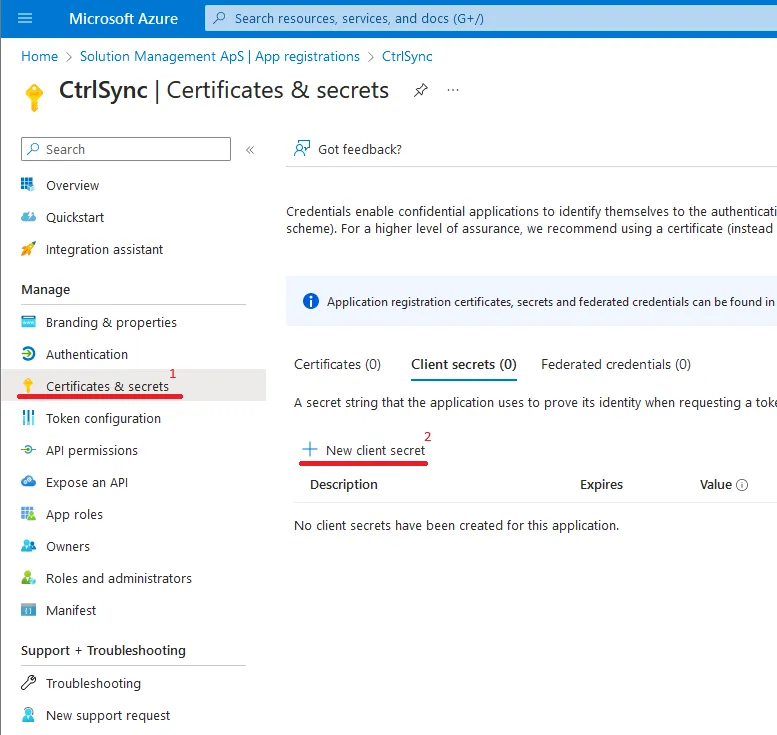
Creating a client secret against the registration. Copy the value now. It is shown once. Keep it somewhere temporary while working through this example and remove it afterwards; it is a credential to the whole tenant’s files.
-
Add the Graph permissions and get them consented.
Under API permissions, select Add a permission → Microsoft Graph → Application permissions, and add:
Permission What CtrlSync does with it Directory.Read.AllReads directory information — the names of sites, drives and folders Files.Read.AllReads files in all site collections Group.Read.AllReads groups, which is how a team’s SharePoint site is found Team.ReadBasic.AllLists the teams in the tenant Each will show as awaiting approval until a tenant administrator grants consent. Nothing works until they do.
-
Enter the credentials in CtrlSync.
Open the CtrlSync configuration and fill in the client ID, tenant ID and client secret.
-
Create the connection object type.
CtrlSync works from an object holding the URL to synchronise. This example uses a Customer Project class, but any object type will do — and on a real deployment a dedicated connection object type is the better choice, because connections have their own lifecycle.
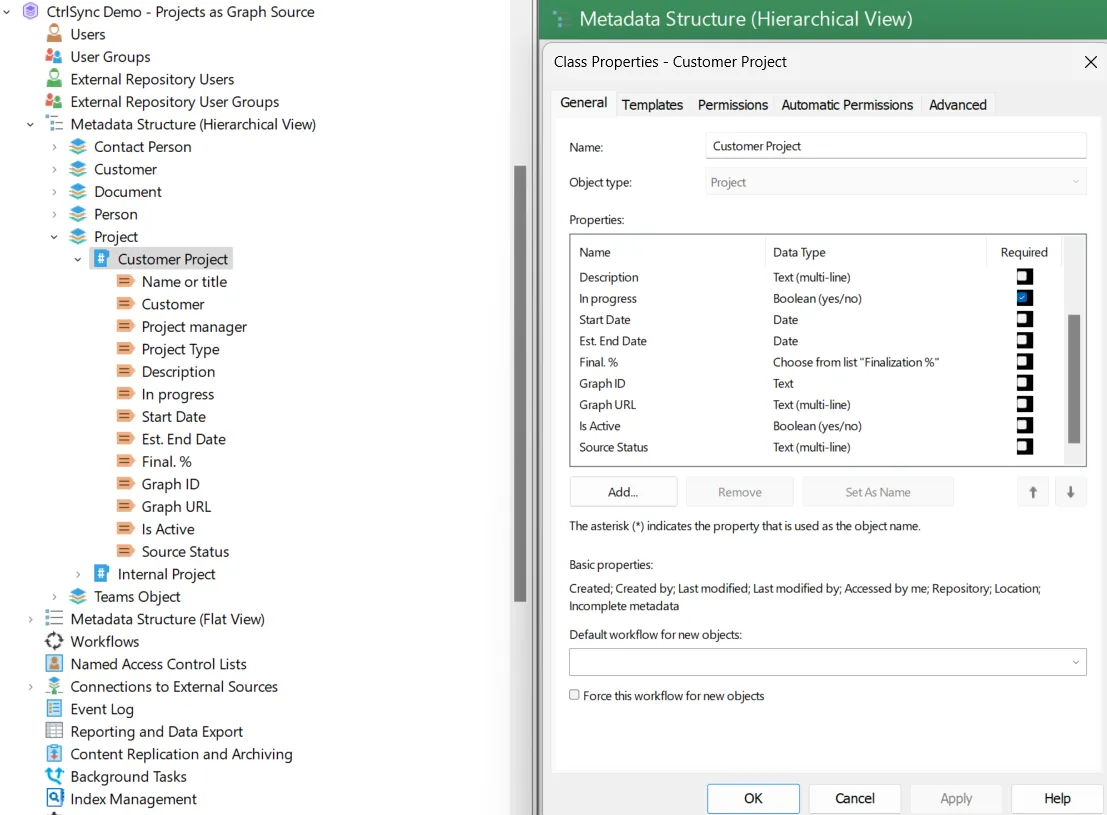
The Customer Project class and the properties CtrlSync reads from it, in an earlier version of this example with fewer properties. Add these properties to the class. “Needed” means CtrlSync’s configuration needs the property, not that the class’s Required checkbox should be ticked:
Property Data type Needed Graph ID Text Yes Graph URL Multi-line text, content type Hyperlink Yes Is Active Boolean Yes Is in Error Boolean Yes Source Status Multi-line text Optional Graph Data Multi-line text Optional Path Multi-line text Optional Custom Created-By Choose from list → Users Optional Custom Last Modified-By Choose from list → Users Optional Create one more property, Document Hash Code (text), which CtrlSync writes on every document it synchronises to tell when the content has changed. It does not need adding to a class.
The two user properties record who created or changed a document in Teams even when that person has no M-Files account, which is worth having wherever read-only users contribute files.
-
Point CtrlSync at those properties.
Back in the CtrlSync configuration, open Microsoft Graph configuration and map each setting to the property of the same purpose:
Setting Property Data Source ‘Active’ Is Active Data Source ‘Error’ Is in Error Data Source Status Source Status Graph URL Graph URL Graph ID Graph ID Document Hash Code Document Hash Code Graph JSON Data Graph Data 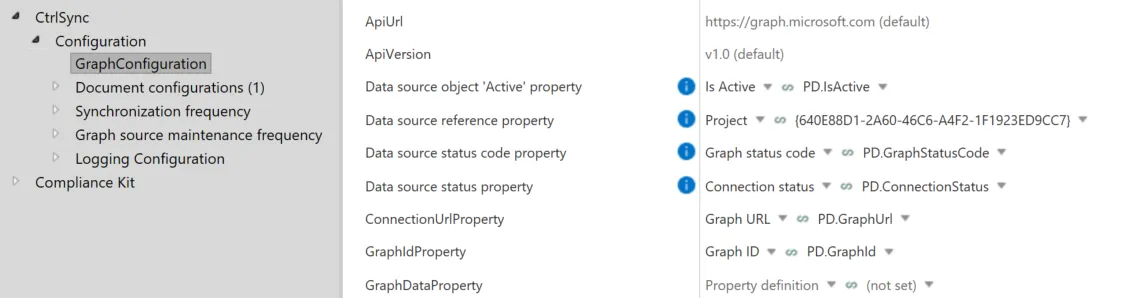
The Graph configuration of an earlier CtrlSync version, which named these settings and properties differently. Map them as in the table above. See Microsoft Graph configuration for every setting in the section.
-
Create a team to test with.
In Microsoft Teams, choose Join or create a team → Create a team → From scratch → Private, name it, and create it. Skip adding members.
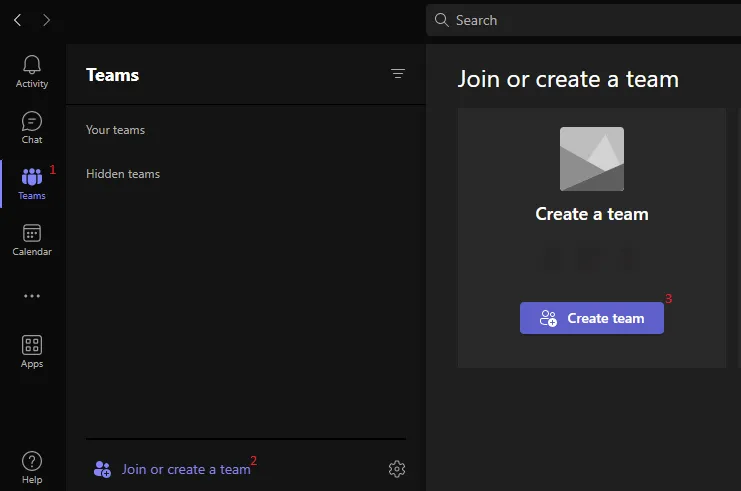
Creating a private team to test against. Find the team in the list, open its three-dot menu, choose Get link to team, and copy the link.
-
Create the connection in M-Files.
Add a Project object in the vault, paste the team link into the source URL property, and set the object to active.
Upload a file to the team’s General channel. Nothing happens yet, and that is expected — CtrlSync has not been told how to import files.
-
Add a document configuration.
In the CtrlSync configuration, open Document configurations and add one.
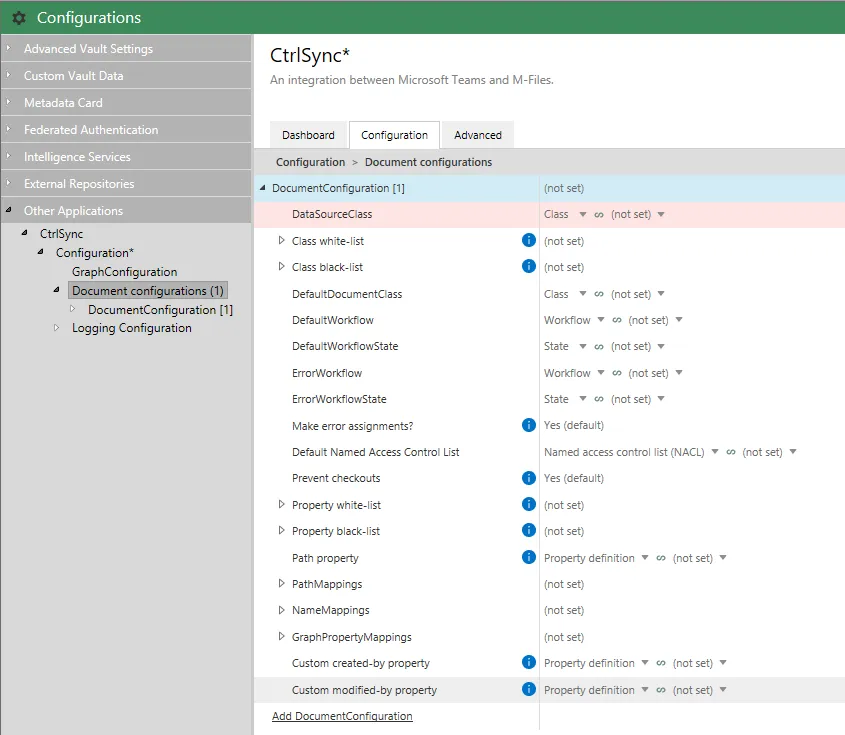
A new document configuration. Connection Source Class was labelled DataSourceClass in earlier versions. Set its Connection Source Class to the Customer Project class, and its default document class to
Document. Different configurations can be applied to different classes, which is how one vault treats a Teams channel and a SharePoint library differently.Files uploaded to the test team now arrive in M-Files as documents.
-
Read the class out of the folder name.
The last step turns the folder structure into metadata. Folders named
Agendas,Memos,Project PlansandReportsmap onto classes of the same name without the plural.
Path mappings matching plural folder names onto document classes. Right-click PathMappings and add a
PathPropertyMapping. Set the matching property toClass, Set once toNo, the mapping type toRegex, and the expression to:(?:.*/)?([\w\s]+)s$Where a folder name collides with a built-in M-Files class such as Document or Report, add a second mapping using an alias instead: matching property
Class, an alias ofReportswith mode Static value and theReportclass, Set onceNo, and mapping typeLast. -
Bring across what Microsoft knows about the file.
Graph property mappings copy metadata from Microsoft 365 onto the M-Files object.
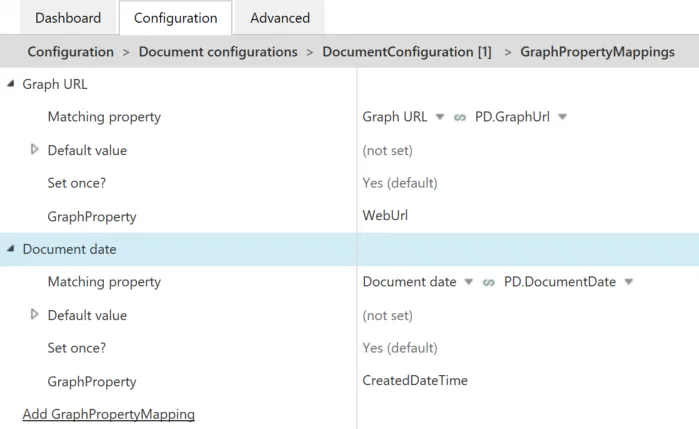
Graph property mappings bringing the web URL and creation time across. WebUrlis the address of the file in Microsoft 365, which makes a link back from the vault.CreatedDateTimeis when it was created there, which is usually not when it arrived in M-Files.
What you have now
Section titled “What you have now”The sample vault connected to a Teams channel: files uploaded there arrive as M-Files documents, classed by the folder they were filed in, carrying their Microsoft 365 URL and creation time.
For more on path mappings, see Mapping properties from a folder path. For everything a document configuration can do, see Document configurations.