
Add a calendar to a portal
A calendar shows M-Files objects on a month or week grid, and lets people create new ones by dragging over it. It works on any object type with a start and an end, which is what makes it useful for meetings, bookings, absences and time entries alike.
By the end of this example a customer portal has a calendar tab holding three kinds of event, one of which can be created without opening a metadata card at all.
Before you start
Section titled “Before you start”- The sample vault example worked through, so there is a customer portal with a menu on it.
- Administrative access to the vault through M-Files Admin.
-
Create an event object type.
In M-Files Admin, open Local Computer → Sample Vault, right-click Metadata Structure (hierarchical view) and add an object type called
Event.Expand it, open the properties of the
Eventclass, and add four new property definitions:Property Data type Event start Timestamp Event end Timestamp All-day Boolean Hours Number (real) These are the minimum a calendar needs. Timestamps rather than dates: a date property loses the time of day, and the calendar cannot place the event.
-
Add a calendar tab to the portal.
In the CtrlPortals configuration, open the customer portal and find Menu → Tabs. Add a menu tab called
Calendar.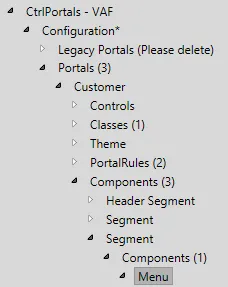
Finding the customer portal's Menu component in the configuration tree. Open the tab’s components list, add a component, and set its type to Calendar.
-
Add an event type to the calendar.
Expand the component’s Calendar section. Its Event types list is what the calendar draws. Add an entry naming the
Eventobject type and class, and map the four properties created above.Two entries are worth understanding:
- Direct Relationship — the property a newly created event uses to refer back to the object the portal is open on. Without it, an event created here belongs to nobody. Set it to the customer reference property. It is optional, and leaving it out is usually a mistake.
- Background color and Text color — how this kind of event looks. With one event type it hardly matters; with three it is the only thing distinguishing them. Leave Text color empty and the text is black or white, whichever reads better on the background.
Leave Height empty. The calendar then fits the space left on the portal, controls and legend included.
-
Try it in the client.
Refresh the configuration in the M-Files client and open a customer’s portal, then the Calendar tab.
The calendar opens on a month view; the week button at the top right switches. Click and drag over cells and release — a new event object is offered for that period. Clicking an existing event opens a menu to see its metadata card, show it in a list, or delete it.
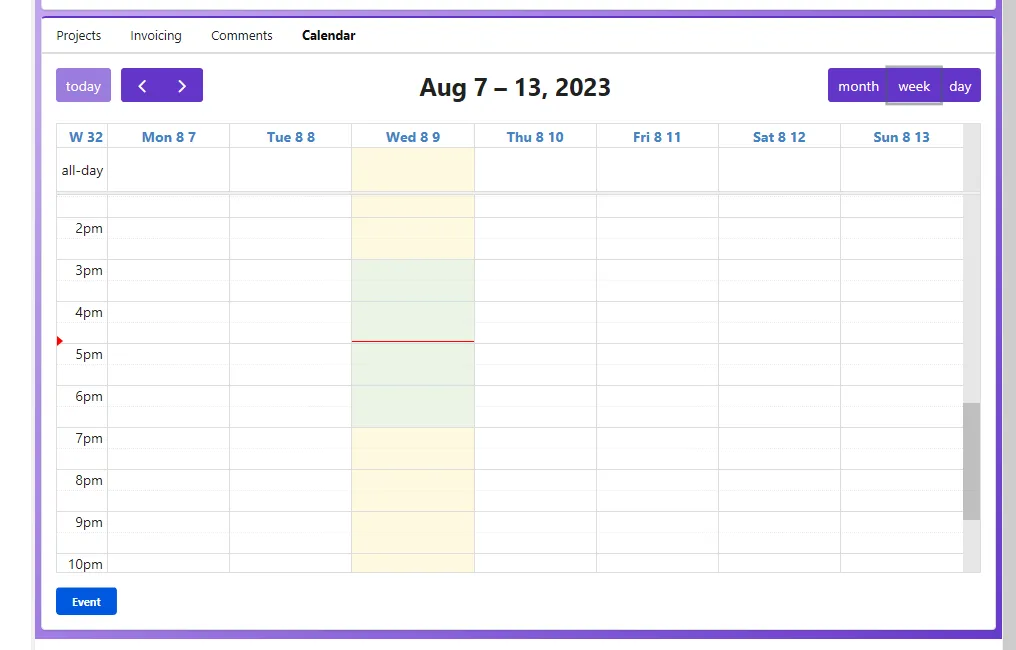
The calendar on the customer portal, in week view. -
Add a second event type that skips the metadata card.
An event class with no required properties can be created straight from the calendar, without a metadata card interrupting.
In M-Files Admin, copy the
Eventclass and rename the copy toMeeting.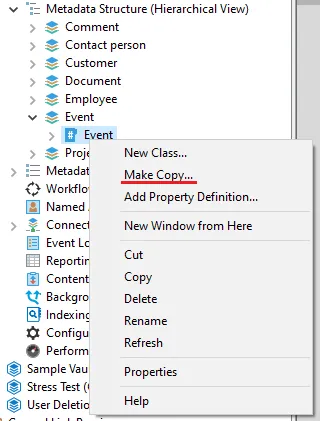
Copying the Event class to make a Meeting class. 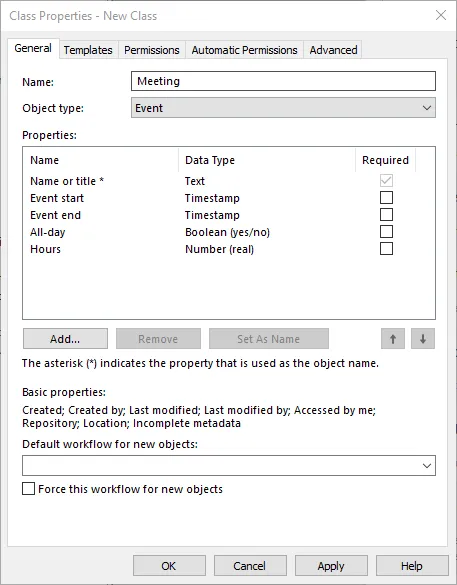
The copy renamed to Meeting. It is still named by the required Name or title property, which the next paragraph replaces. Add a text property called
Event name, open its Automatic values tab, choose Simple concatenation of properties, and add theEvent startproperty as a placeholder. AddEvent nameto the class, move it to the top, and choose Set as name. Then remove theName or titleproperty.The class now names itself from its start time, which is why nothing has to be typed.
-
Point the calendar at the new class.
Back in the portal configuration, copy the existing event type in the component’s Calendar › Event types list, change its class to
Meeting, and give it a different Background color.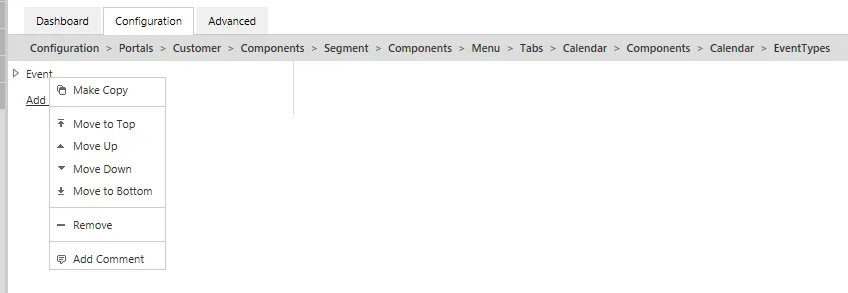
Copying an event type to point at the new class. Refresh the configuration and open a customer’s calendar. Meetings can now be created without a metadata card, and the buttons under the calendar show and hide each type.
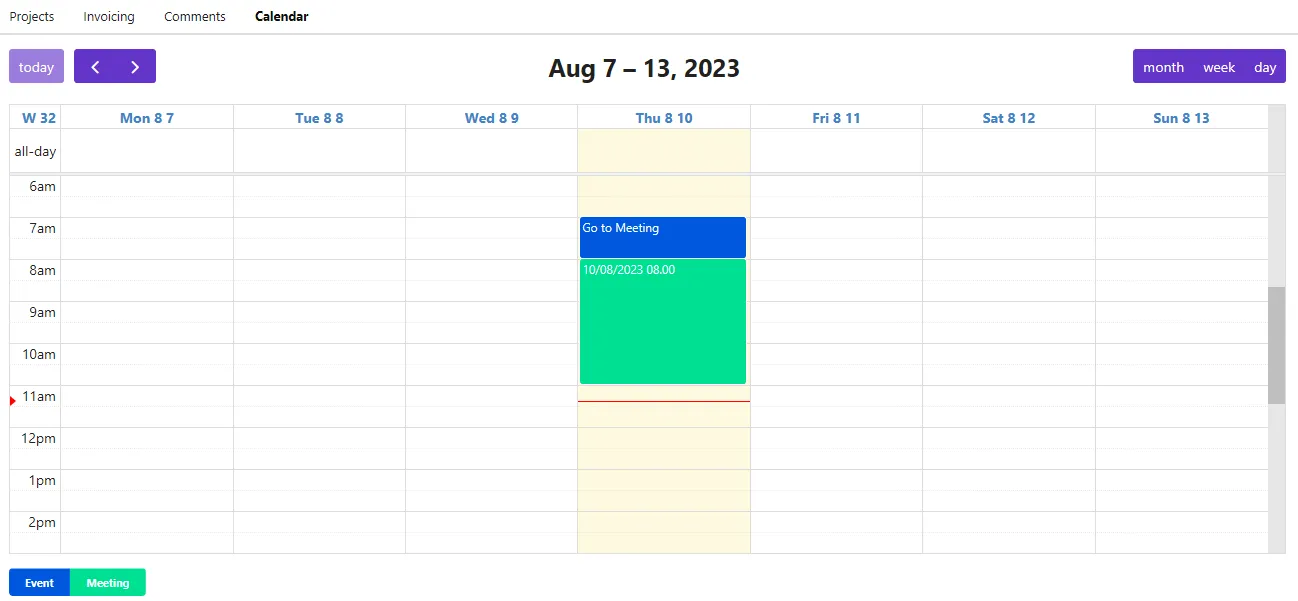
Two kinds of event on one calendar, distinguished by colour. -
Add a background event type.
A background event sits behind the others rather than competing with them, which is what makes it right for working hours, opening times or anything else that marks a period without occupying it.
Copy the event class again, naming it
Working hours. Copy the event type in the calendar once more, point it at the new class, change the colour, and set IsBackgroundEvent toYes.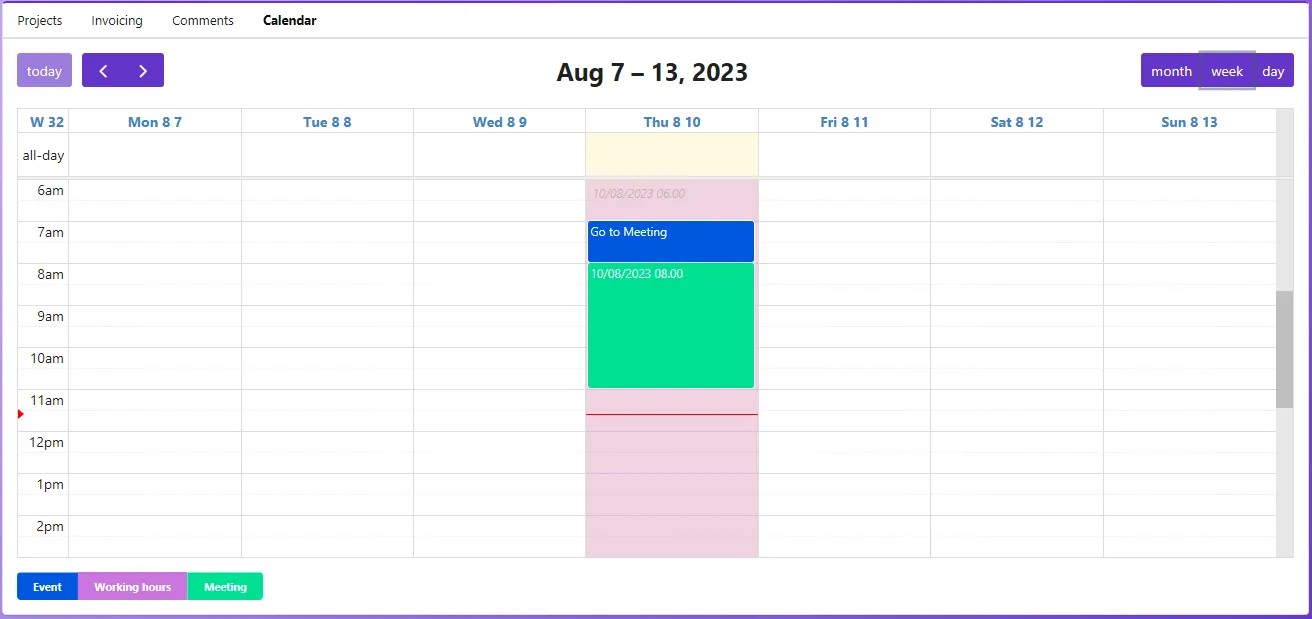
A working hours band behind the ordinary events.
What you have now
Section titled “What you have now”A calendar tab on the customer portal showing three kinds of event in three colours, one of which is a background band. Events can be created by dragging, and meetings without touching a metadata card.
For every setting a calendar has, see the Calendar component reference.